
One of the features that has received an interesting improvement in this new version of Mailrelay is A/B testing.
This feature allows you to run a newsletter sending test on:
- Sender
- Or subject
With a small subset of subscribers, and by looking at the results from that small group, you then send to the entire list using the winning option, which gets you better results from the send.
Interesting, right?
It’s a feature that helps us get better results from our email campaigns, without us having to do anything.
Also, this version of Mailrelay includes a very interesting new feature. Want to find out more?
Keep reading!
The first thing to keep in mind is that, to run an A/B test campaign, we must have created a newsletter beforehand.
If we meet this requirement, we’ll go to the menu “Newsletters” – “A/B Tests”:

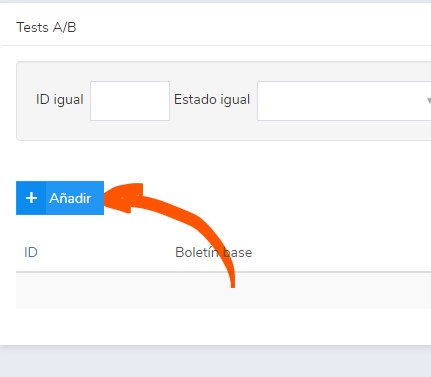
Then we’ll click the Add button to create the new test:
The first step now, as we mentioned earlier, is to choose the base newsletter that we’ve created, to use it in the A/B test:
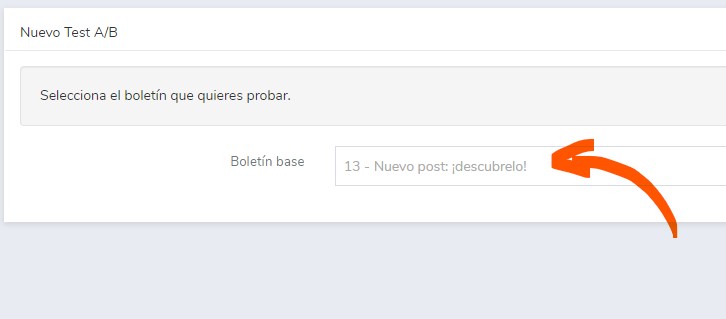
As you can see in the image, all you need to do is choose the newsletter and then click “Next”.
The next step is to select the group the email will be sent to:

We can select one group or several. What matters is that together they have at least 10 contacts, otherwise it won’t be possible to send with an A/B test.
When we click “Next” we’ll go to the final A/B test screen, where we’ll make some important decisions:
- The type of A/B test
- What percentage of the total contacts we’ll use for the test
- And how the winning newsletter will be decided.
Here you can see an example of the options:
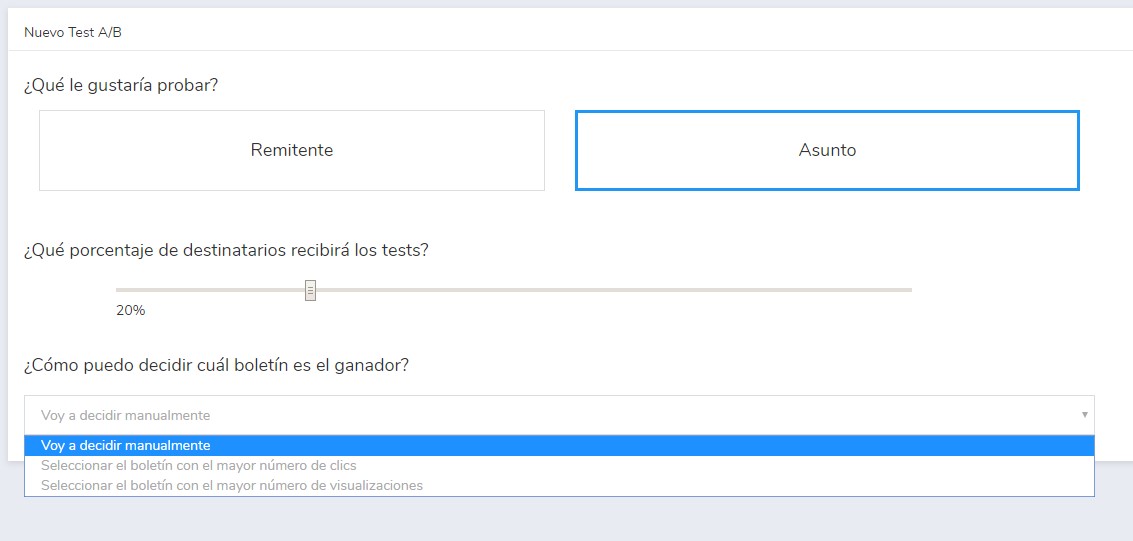
In this case, I’ve chosen to run a test on the “Subject”, so I’ll test two different subjects: the original one and another that we think might work better.
With 20% of the total contacts.
And I’ll decide manually which of the two options to send to the full list.
If we had chosen one of the automated decision options (by clicks or views), we would see this:
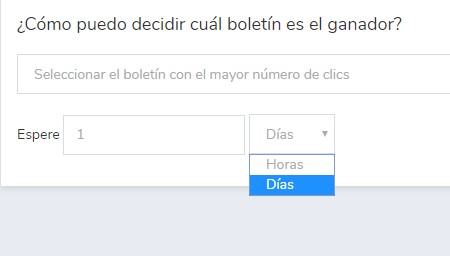
This way, we can have the system evaluate the clicks or views, after the defined waiting time, and after that period send the newsletter automatically using the option that has produced the best results.
Very useful for setting the process up on a schedule so that we don’t have to do anything else.
► Contact summary
On the right side of that screen, we can see a summary of the number of contacts that will be used:
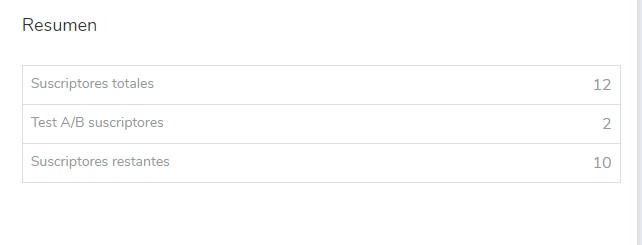
The total number of subscribers, the ones that will be used in the test, and the ones that will be left for the final send.
► Selecting the subjects / senders
Then we’ll click “Next” and finally we just have to define the subjects to be tested, or the senders if we’ve chosen that option:
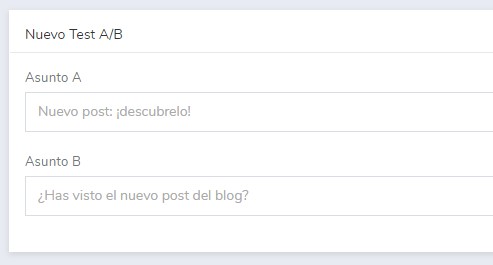
After choosing that, when we click “Next” it will take us to the final summary screen.
► Final summary
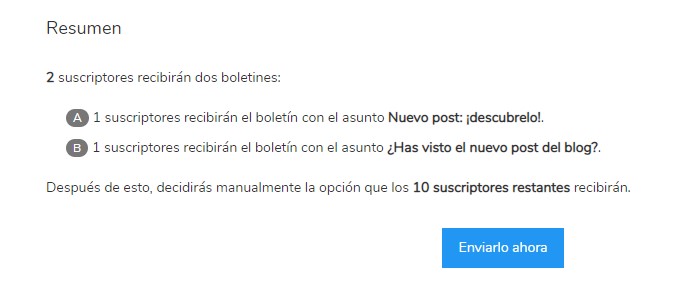
Here we can see a complete summary of the actions that will be carried out, how many subscribers the tests will be run with, and how many contacts the final send will go to.
When we click “Send now” the actions will be executed, and it will take us to a screen with preliminary statistics and decision-making:
· A/B test statistics and decision-making screen
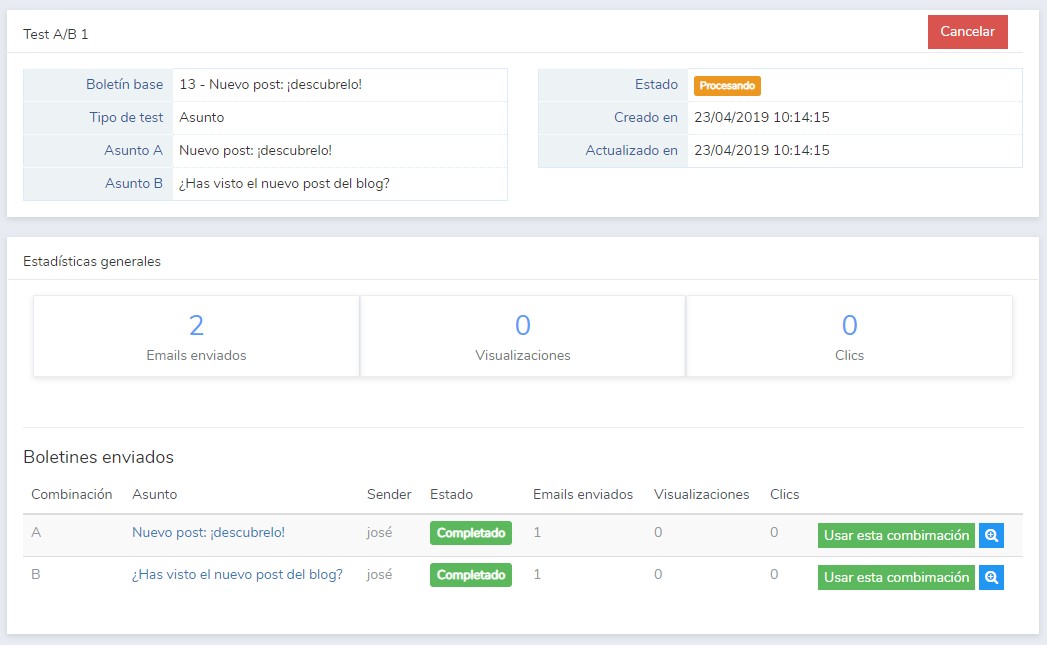
If we’ve selected manual decision-making, here we’ll have all the data we need to make the decision:
- Emails sent, total views and clicks
- The subjects used
- Emails sent, views and clicks for each specific version
It’s important to let enough time pass, until we can make the right decision, and once it’s clear, we’ll just have to click the button “Use this combination”.
IMPORTANT
We can always come back to this screen from the menu “Newsletters” – “A/B Tests”, and we’ll see the tests, as well as their status:
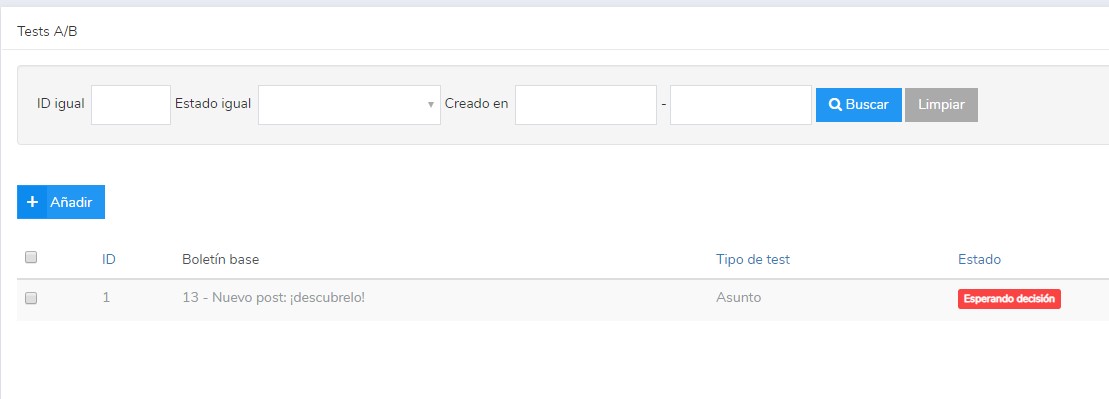
In this case, you can see that the send is “Awaiting approval”.
· A/B test statistics
After sending, we can review the statistics by going into the A/B test, as before, and clicking the magnifying glass to see the details in the usual statistics report:
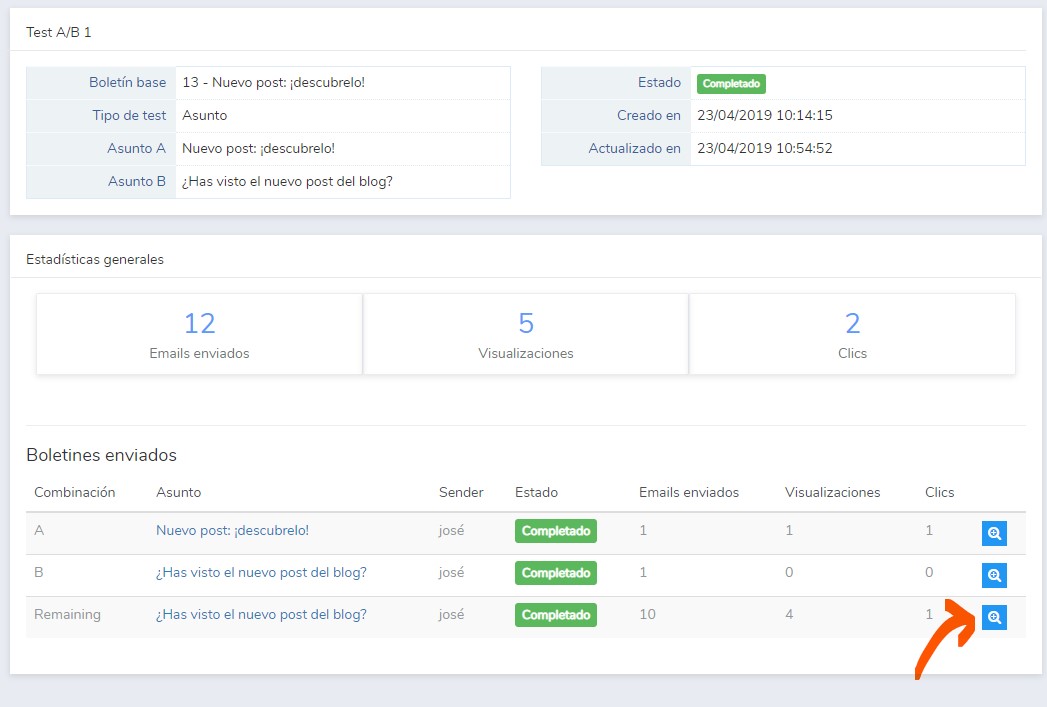
We can see the statistics for the different tests and for the resulting send.
The statistics screen is identical to the one for a normal send. You can check previous posts to see how this screen works.
Overall, the A/B testing feature is very interesting. Have you used it in your email sends?
This type of testing helps you improve your open rate by identifying which subjects and senders work best with your audience.