
We have recently added a new feature to the new version of Mailrelay, webhooks.
Webhooks complement sending via API or SMTP services to integrate Mailrelay with your external systems.
Webhooks allow real-time connections with external systems, and you can currently define them for:
- When a subscriber is added to a group
- When they are removed from the group
- Or when they unsubscribe
What can we use these webhooks for?
Here is a very simple example: imagine your company manages all its contacts and customers in its own CRM, where it keeps all their data, previous purchases, etc. And to send them email campaigns, your company exports these contacts and imports them into Mailrelay, and sends from there.
The problem, until now, was that although in Mailrelay contacts can unsubscribe through the links in the newsletter, to unsubscribe them in the CRM (or another external system) you had to use the API or do it manually.
With the new webhooks option it is easier to send a request and handle it programmatically on the CRM side.
In this post we will see how to define and test webhooks.
· Defining a webhook for unsubscribes
Webhooks are defined in the Automations section:
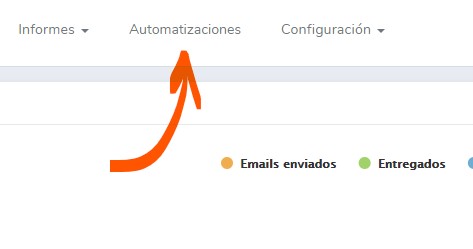
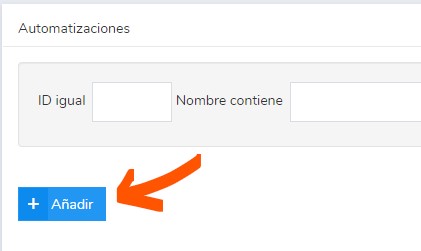
Once in this section, we will create a new automation:
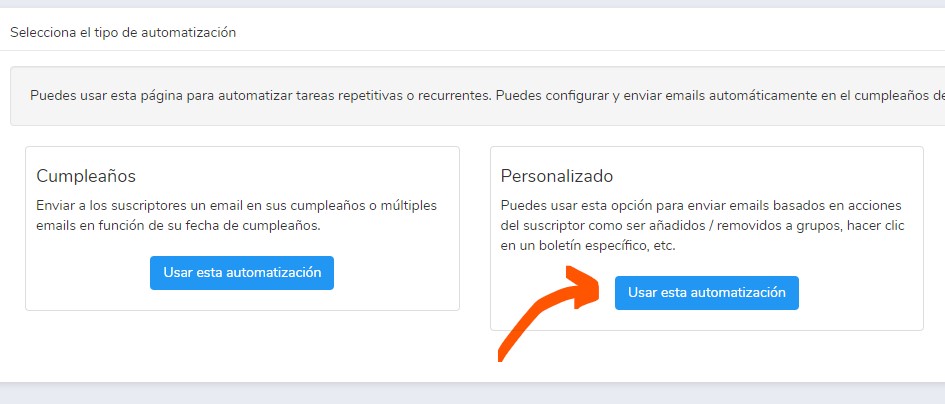
The automation we are going to create is of the “custom” type (the other option is birthday, but we are not interested in that one right now):
From here we will need to do the basic setup of the automation.
We will go over the most important parameters after the following image:
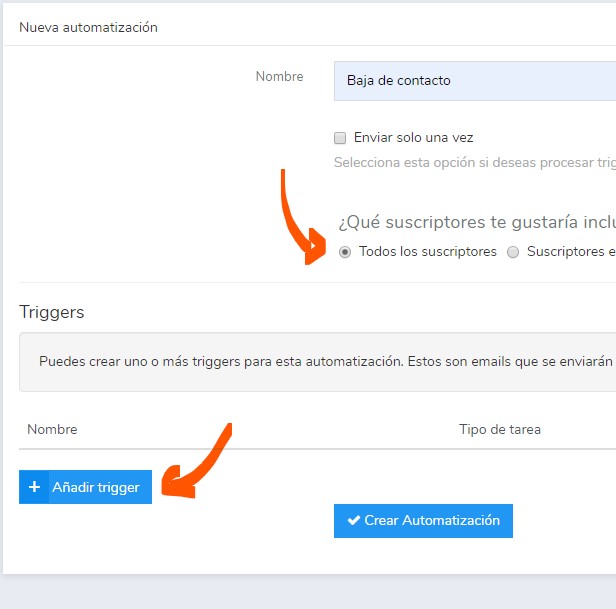
We have these options:
- Name: this is just the internal name of the trigger, you can call it whatever you like
- All subscribers: we could define a specific group, but for this example I am selecting all of them
After setting those, we will need to “Add trigger”, to define the action that will fire the event.
We will choose the “Subscriber Activity” option:
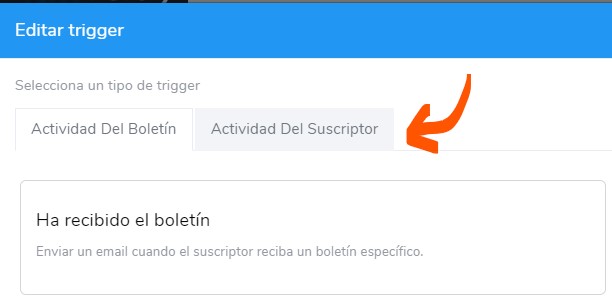
Among all the subscriber activity options we have:
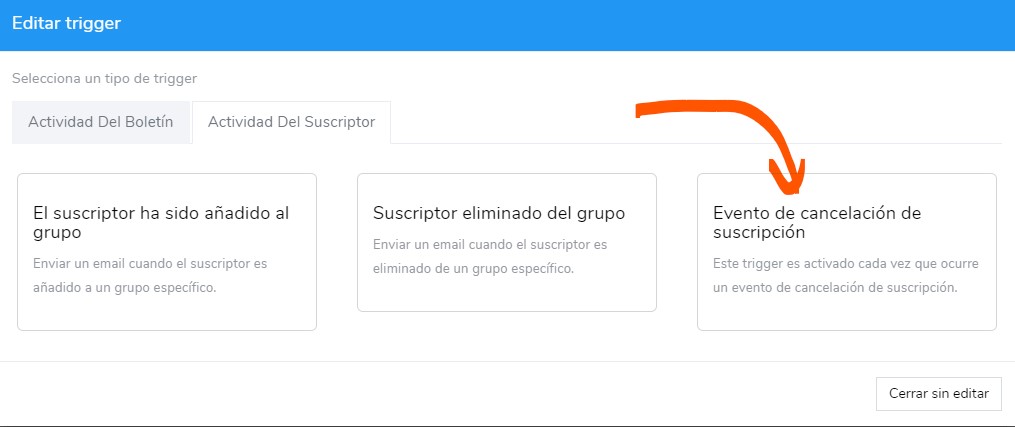
We will use the unsubscribe event, which is the one we are interested in at the moment, but it would be possible to define events for when a subscriber is added to a group, or is removed from a group (without unsubscribing):
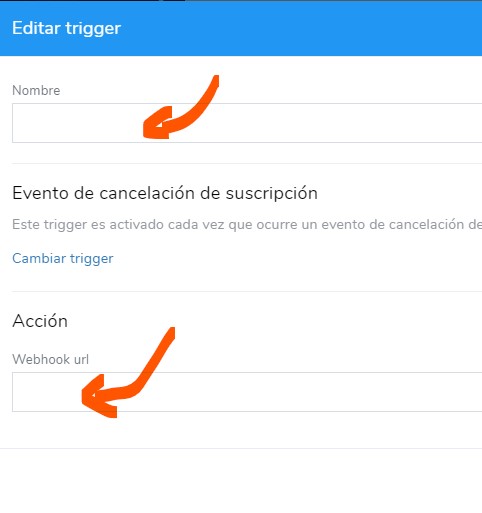
We will give the trigger whatever name we want and, something important:
- Webhook url: that is, the URL the request will be sent to when a contact’s unsubscribe is processed.
- The request is normally sent in the GET array, not in the POST array
The webhook’s destination URL is a URL on our website where we can receive the information sent by Mailrelay, with details of the contact who has unsubscribed, and process that information however we need.
Once that is done, all that is left is to Validate and apply:
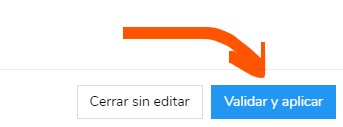
And finally, to create the whole automation, click the “create automation” button:
That way everything will be ready, and all that is left is for the CRM or software side to handle the calls that will be fired whenever an unsubscribe occurs.

· Testing the webhook with testing tools
You may want to test the webhook before you have the programming on your software’s side in place; for that you can use a service such as RequestBin:
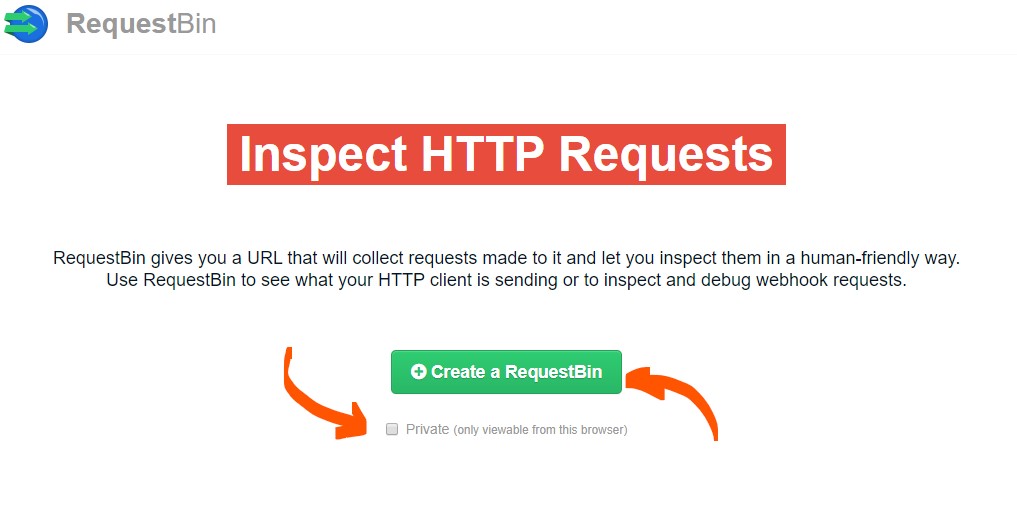
On this screen you just need to click the “Create a RequestBin” button. I also recommend creating it as private.
Once that is done, you will see a screen similar to the following one:
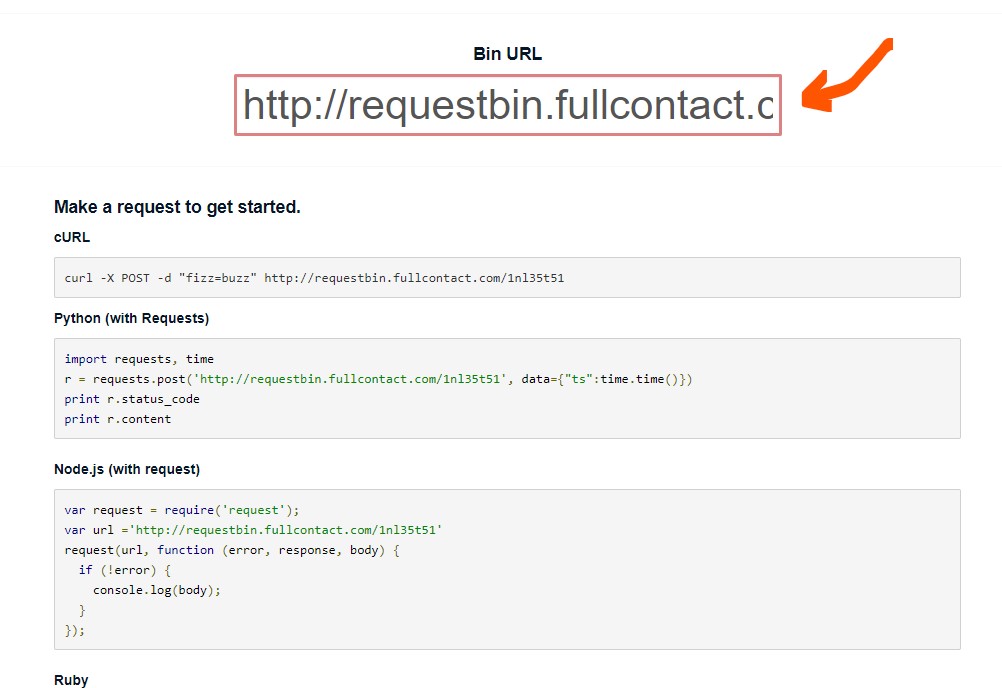
You can copy that URL and paste it when you are creating the webhook:
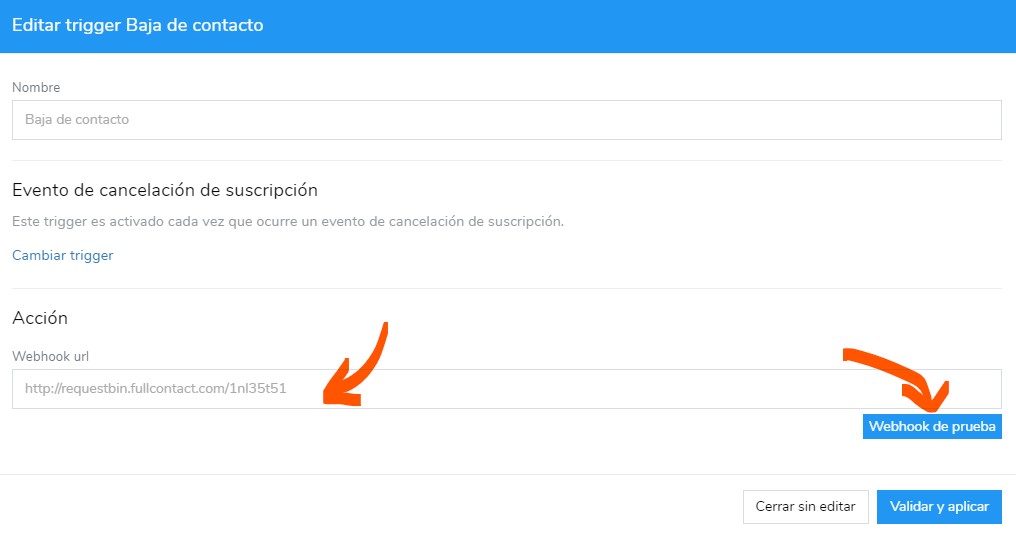
We just need to put the URL in the form field, and then we can launch a test with the “Test webhook” button:
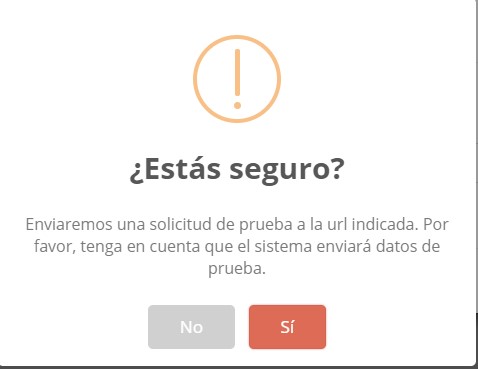
If we accept the message the webhook will be sent, and we will be able to see the request in RequestBin:
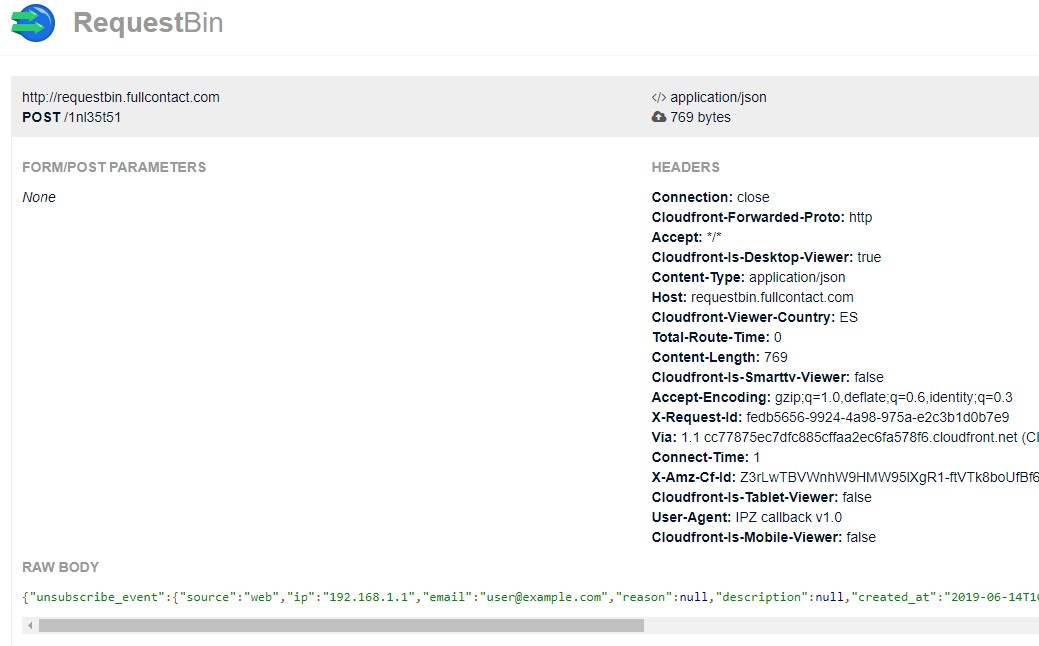
It is a sample request, but it has the same structure as a real one:
{«unsubscribe_event»:{«source»:»web»,»ip»:»192.168.1.1″,»email»:»[email protected]»,»reason»:null,
«description»:null,»created_at»:»2019-06-14T10:48:41.510+02:00″},
«time»:»2019-06-14T10:48:41.511+02:00″,»automation_trigger_id»:0,»subscriber»:{«id»:null,»email»:»[email protected]»,
«name»:null,»score»:null,»status»:»inactive»,
«subscribed_at»:null,»subscribed_with_acceptance»:false,»subscribe_ip»:null,
«unsubscribed»:false,»unsubscribed_at»:null,»unsubscribe_ip»:null,
«unsubscribe_sent_email_id»:null,»address»:null,»city»:null,»state»:null,
«country»:null,»birthday»:null,»website»:null,»bounced»:false,»reported_spam»:false,
«local_ban»:false,»global_ban»:false,»created_at»:»2019-06-14T10:48:41.507+02:00″,»updated_at»:»2019-06-14T10:48:41.507+02:00″,
«custom_fields»:{}}}
That way you can learn its structure and handle it in your own system.
You can also make real requests if you save the automation and trigger a real unsubscribe.
You will see those in RequestBin, but this time with the contact’s real information.

Related posts:
- Professional SMTP and API for Transactional Emails with Statistics
- Storytelling Examples: The Best Stories
- Subliminal Advertising: Types and Examples
- Advertising Teasers: Strategies for Your Branding
- Identify Strengths and Weaknesses in the Digital Economy from Scratch
· Automations when adding a contact and changing groups
So far we have talked about creating a trigger for unsubscribes, but there are other actions too, such as when a new contact is added, that is, when a new contact signs up.
The difference is that in these cases, unlike with unsubscribes, we also have the option of sending an email in response, so the webhook appears in a dropdown:
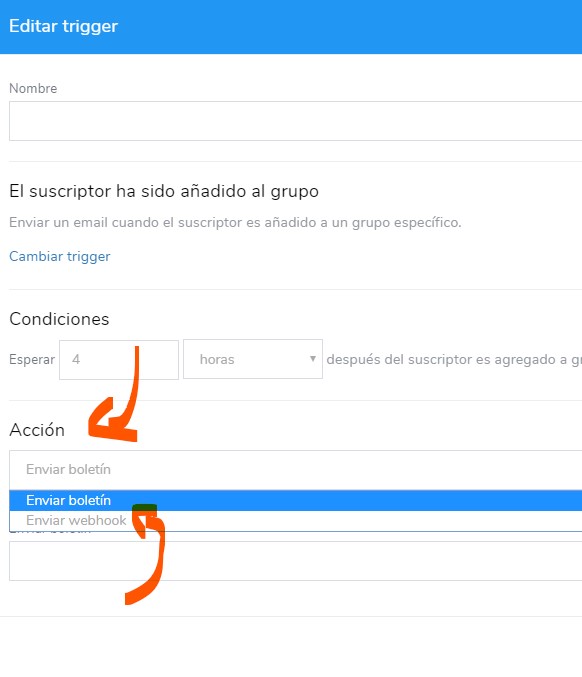
This is really the only difference, since otherwise it behaves exactly the same.
Keep in mind that within an automation, you can create as many triggers as you need. So you can have one trigger that sends an email to the contact when they sign up, and another trigger that sends a webhook, no problem.
We hope this new feature is useful to you.
If you want to know what else is new in this version, here is a summary of the new features in Mailrelay v3, and in our glossary you can see the full list of Mailrelay features.