
If you work with marketing, you probably read information about the importance of creating a landing page as part of an effective sales strategy. If you need to capture subscribers, leads, or customers, you will have to learn how to work with this feature.
As many of you will surely know, a landing page is a page designed for receiving visitors who found your site after clicking on an ad or banner (Facebook, Google or any other platform). Its use is increasingly widespread, and its main purpose in most cases is to capture leads or generate conversions.
A landing page is a page created for one purpose: Generate conversions. Generally speaking, the user visiting this page is interested in what you are offering. Creating an effective landing page is an art because you will need to consider various aspects such as page design and content. If you already know what a landing page is and you want to use this option in your marketing strategy; we are going to explain how you can add a Mailrelay subscription form to a landing page to capture leads and subscribers.
Important clarification: In this post, we will assume that you already created a subscription form on Mailrelay and copied the HTML code that you will use. So we are going to focus on explaining how to integrate this code into a landing page. If you haven’t created the form or didn’t copy the HTML code, we advise you to check this other post: Mailrelay V3 Subscription Forms.
· How to add a subscription form to your landing page in WordPress
Option 1: Using Elementor
We have already talked about Elementor in other articles. It’s a powerful plugin that is available in WordPress, with Free and paid versions. It is an ideal option for creating and editing landing pages quickly and easily.
If your site was created using WordPress, it is highly recommended to use this plugin to set up your landing page as the process will be easy and simple. If you have not installed the plugin yet, you can download it for free from the WordPress repository and use it to create your landing page. Let’s start?
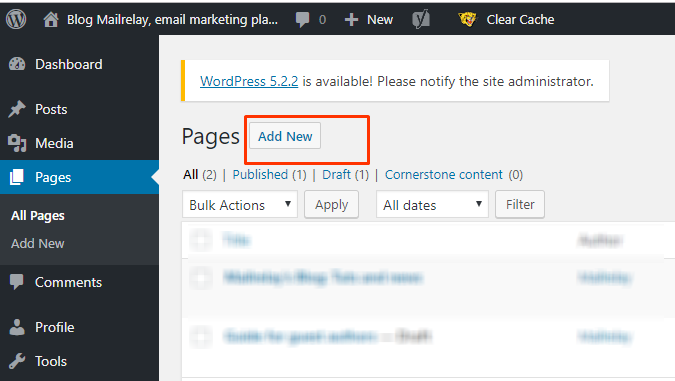
Once inside the WP admin panel, you should click on “pages” and add a new one.
You will have to use this new page to insert the content that will be displayed to your visitors. In this case, before you start editing the layout, it is advisable to make some previous adjustments. For instance, you should name the section, choose the template, etc.
We often see landing pages that don’t have a top bar menu. This is often used when we want the visitor to focus only on the content, not “escape” by clicking on any other link. This can be especially useful on landing pages created for online campaigns.
If you want to implement this measure and remove the navigation menu on your landing page, you should look for the attributes in the right column. Once you find this option, in the templates section, select “Elementor Canva” and save your work.

After that, open the Elementor builder, clicking “Edit with Elementor” and start building your landing page following the structure, you want to use.
After creating the page, you will have to implement the subscription form. In this case, you can get the HTML code and insert it into the page.
To do that, you should look for the “code” module and include it in the column or section you want. Once placed, you will have to insert the code you copied before you started reading this article. In this case, you will have to paste the code generated by Mailrelay to embed it in your landing page.

After adding the form, the result would look something like this. It is important to keep in mind that the structure and design will vary depending on the modules and elements you installed.

At this point, I would like to point out that the form will be displayed with the look and styles marked in your template or theme. To make style changes or modifications, you will need to edit the HTML or use specific plugins to customize your opt-in form.

Option 2: Using Divi
Divi is one of the most used templates for creating sites in WordPress. This template is so popular because it offers a powerful visual builder, which allows you to create attractive and colorful pages with just a few clicks.
Divi is currently a Premium (paid) tool and is available as a template and as a visual builder for WordPress. If your site was created with this template or you have installed the Divi Builder plugin, keep reading as we will show you step by step how to add a subscription form on a landing page using Divi. Let’s start?
The steps are very similar to the ones we saw in the previous guide, so the process we will follow will be quite similar to what we saw with Elementor.
First, let’s go to the Pages section and click “add new.”
After accessing the new page, we will start editing the main settings. If, as in the previous case, you want to delete the top bar of your landing page, you should look for the “template” option in the right column and click on “blank page.”
With that, we will be telling WordPress that we don’t want to display any top bars in this specific section of the site. Interesting, right?

Once you have named the page and selected the template settings, don’t forget to save your changes.
Next, we’ll start building our landing page with Divi. To do that, click on “Divi builder” and the plugin will display the screen with the landing page builder. Divi, by default, gives us several options to choose from: We can use a default template and adapt it or create one from scratch. You can choose either of the two options.
Once you’ve set up your landing page, it’s time to insert your Mailrelay subscription form. In this case, we will have to look for the “Code” module in Divi’s right bar and insert it in the column or section we want. After doing that, the plugin will open a window with a field where we can embed the HTML code generated by Mailrelay. If you have not created an HTML form, please generate it now.

After adding the code, you will be able to see how it will help loke like on your landing page.
As in the previous case, the form will be displayed with the styles defined in your template or theme. To make changes, you will have to edit the HTML manually or use an external plugin.

· How to add a subscription form to your landing page without using WordPress
Although WordPress is one of the most commonly used CMS for creating websites, you may want to create your landing page without using this platform. However, if you aren’t working with WP, we are going to recommend some tools you can use to create your own landing page quickly.
At this point, it is important to note that most of these tools aren’t free, but they usually offer two weeks or more of testing, so that you can start using the service to see if this is what you were looking for. After testing the tool, you can decide whether or not you are interested in paying for it.
For this article, we will focus on explaining how to use Instapress for creating landing pages. This tool was created for users who don’t want to design a page manually, so you can edit the available templates or create your own layout.
The first thing you will have to do is register on the platform to start using the free demo. To do that, go to the Instapage page and create an account.
After accessing the platform, in the desktop section, click “Create new page” to start creating your landing page.

Here you will have several options. For this tutorial, we will choose the first one: “Standard page.”

After selecting this option, you will be taken to another screen where you can choose from several templates. If you want to create your page from scratch, you can select the “blank page” option, or you can choose one of the predefined templates.
In this case, it is important to make it clear that the subscription boxes that are available in the templates can’t be used as we will have to work with the HTML code generated by Mailrelay.
Once you’ve chosen the option, you want to use, add a name to the page and start editing the landing page, leaving a space for the opt-in form.
After editing the layout, you will have to insert the form. If you check at the top, you will see several options. To add the form, click on “HTML.”

The plugin will display a box that you can position wherever you want. Note that this box corresponds to the form, so you should place it where you want to show the form. To enter the HTML code, click on the box and select the “Edit” button.

The box will be blank, and you can enter the code. Paste Mailrelay HTML form and click on “Done.” If you followed all the steps correctly, you would see how your form will be displayed.

As in the previous cases, it is important to note that the form doesn’t include styles embedded in the HTML code. So if you want to customize it, you will need to edit the code manually. If you are not familiar with HTML, we recommend using the default form generated by Mailrelay.
Lastly, you must click the “Save” button in the upper right corner of the screen.
After saving the changes, you will have to publish the page. To do that, click on the page you want to publish and in the next window look for the “Publish” button and click on it.

To post the landing page permanently, you will need to set the page URL. Therefore, after clicking on Publish, the system will display a popup with options to configure it. Click the “Set URL” button and, among the different available options, choose the best option for your digital marketing strategy.

If you are working with WordPress, you can choose this option and follow the steps on screen to publish the page. If you don’t use WordPress, you should Click on the first option, “Custom domain” and follow the instructions for setting up your domain.
Beside each option, you will find a “Learn more” link. If need to find more information about the steps you should follow, click this link. You will be directed to an informative section with everything you need to know to make the necessary changes and publish your page permanently.

· Conclusion
If you are running an online business, you will certainly need to create landing pages as part of your sales strategy. As we explained at the beginning of the post, these pages are extremely useful for capturing potential customers.
In fact, this is a widely used tool for collecting data and creating mailing lists. Strategies for getting this information can vary a lot, although most webmasters prefer to offer a “gift” or “bait” in exchange for the data. What kind of gift could I offer? You could create a tutorial, a mini-course, a guide. It will depend on your sales strategy.
To help you in this task, in this article we wanted to show different options for creating a landing page and the steps you will have to follow to integrate a Mailrelay subscription form with the page. On this occasion, we focused on 3 Different options. However, you can create a landing page with any other tool that offers options for embedding external HTML.
Have you ever used a landing page to capture customers? Do you find it useful?

Hi Mailrelay
I’m testing your software and try to create a submission form. Adding field: I can’t find a field for comments / a field with multiple lines – like this one I am writing in. Can you help please? Appreciated. Thanks!