Do you have a blog on your website? Do you want to automatically send a newsletter to your subscribers with the entries you have posted?
That’s what we’re going to see today.
Since version 2, Mailrelay supports automated sending of campaigns from an RSS feed, such as the one generated by WordPress or some Internet services, and now in V3, we have updated this automation tool.
You can now even add an RSS feed from YouTube.
Do you find it interesting?
Let’s review this system and see the new features available.
· Free and automatic email marketing for your WordPress blog
First, we’ll review the basic tool.
If you have a WordPress site, for example, you can get your RSS feed quite quickly.
On your website or blog, right-click, and you will see an option that says something like «View page source code»:
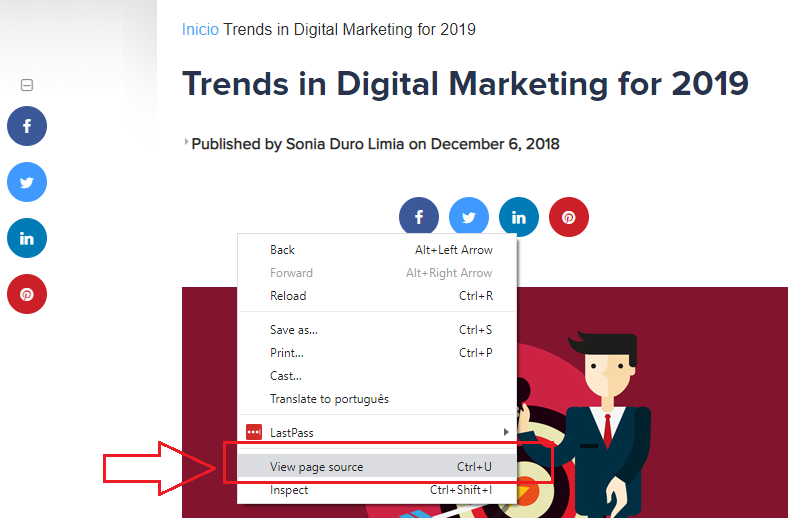
If you click this option, you will see the source code for your website or blog.
Don’t worry, just look for the RSS link:
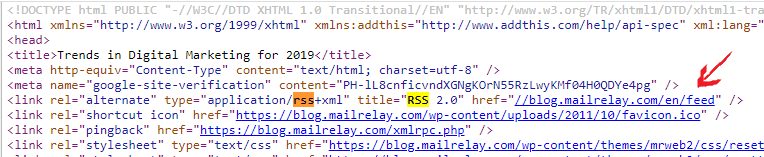
When you click on the link, it will take you to another page, which is the RSS feed page. You can copy that URL, as you will use it in Mailrelay. In the case of our blog, for example, the URL is:
Note: If your website is in maintenance mode, the feed will also not be accessible. Also, some plug-ins generate problems in the feed, so access it manually to ensure everything is correct.
Usually, whenever you post a new entry, your feed will be updated. If you work with our email marketing software, you can configure the system to send a newsletter whenever your feed is updated.
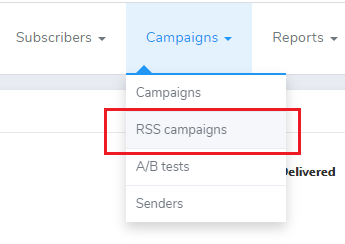
►Campaigns -> Rss campaigns
The first thing to do is to go to the RSS Campaigns menu:
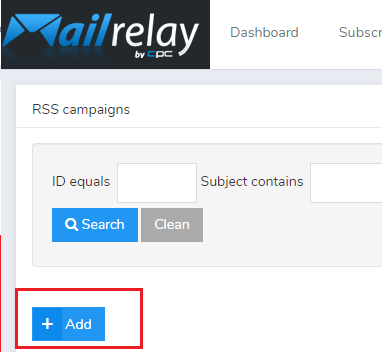
In this menu, you can add a new RSS campaign:
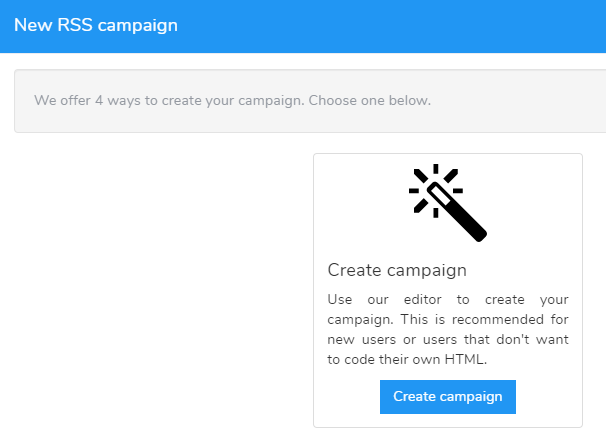
Well, now, let’s look at some of the main options for setting up RSS campaigns.
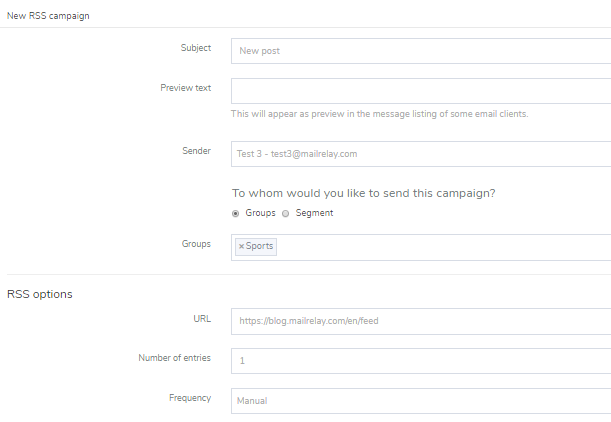
These parameters will define the message that will be sent, so we need to make sure everything is properly configured. See the following image:

Let’s look at these parameters one by one:
- Subject: This is the subject line that your subscribers will see in their inbox.
- Preview text: a short text that your contacts will see when they receive the email
- Sender: the sender of the newsletter
- Groups or segments: Here you will have to select the list that will receive the newsletter
- URL: the URL of the RSS feed
- Number of entries: the number of entries you want to include in each newsletter
- Frequency: how often the email will be sent (daily, weekly, or manually)
Let’s see a real example:
These are your campaign settings, but you will still need to create the newsletter.
► Importante! Mostrar o título da entrada no assunto
Important! How to include the title of the entry in the subject:
- {{ first_rss_entry.title }}
If you want to display the title of the entry directly in the subject, just write this tag in the subject line of your email:
You can mix the tag with other texts, for example:
- New article: {{ first_rss_entry.title }}
And so you can display the title of the post along with a default text.

To start preparing the newsletter, we created a campaign like the one you can see in the next image.
This text box is the one we will use to embed the tags of the RSS feed.
We can click and select all the text to remove it:
After deleting it, we will use the “variables” drop-down menu:
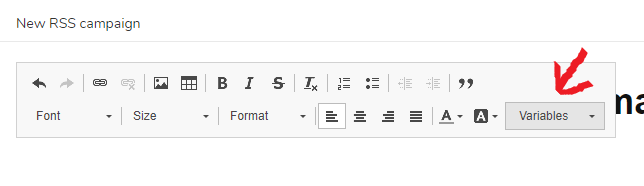
These variables will allow us to incorporate all the elements necessary for our RSS newsletter to work correctly.
What we mainly need is a “loop for RSS entries”:
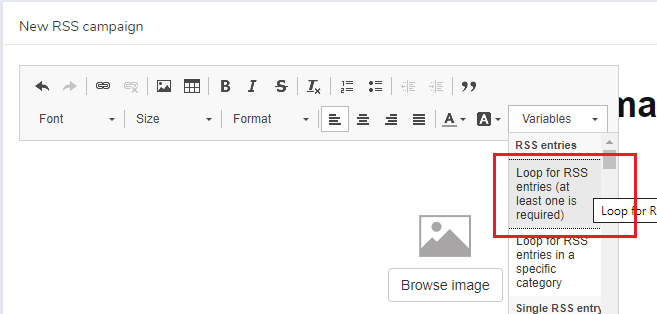
This variable will insert the basic structure without which your RSS emails won’t work.
It would look something like this:
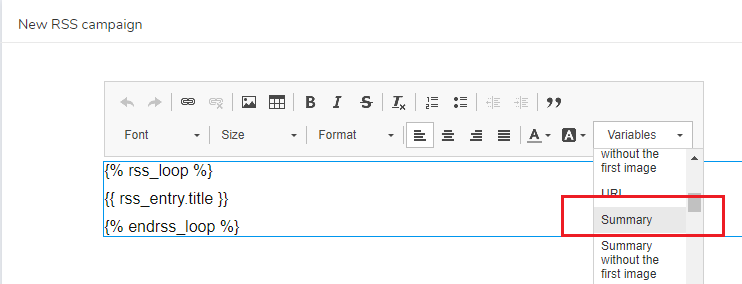
► Your fist tag should be {% rss_loop %} and the las one should always be {% endrss_loop %} and these two tags should never be changed or deleted. Although you could place them in several text boxes, the important is that the rest of the tags are included between these two ones.
In this case, the other tag {{ rss_entry.title }} will be replaced by the title of the entry.
We could, for example, add a summary of the entry:
An important recommendation:
Check your RSS settings.
The availability of RSS tags depends directly on your blog or website’s RSS settings. Thus, if your website’s RSS doesn’t have the summary tag, it will not be displayed.
Or, if your feed summary includes the entire article, that is what will be added to your campaign. Check your feed settings first to make sure what’s available.
► How to include a link to your RSS entries
We can see that if we enter the URL of entry like this:

Using this variable, what we will get at the end is a URL, not a link to a call to action.
So, what can we do to create the link correctly?
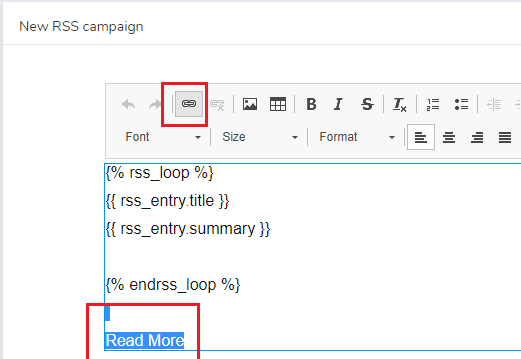
First, you should copy the following tag, {{ rss_entry.url }} :
And you should also include a CTA, for example, read more, or something similar, and use the icon to insert a link:
This will open a pop-up like this one:
in this window, you will have to enter two values:
- Protocol: choose the option “other.”
- URL: type or paste the tag: {{ rss_entry.url }}
With that, the text box will look like this:
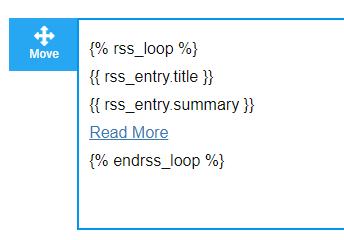
Basically, we are using three tags.
Although you have to add more data, this newsletter already includes the basic settings.
► Inserting an image from the RSS feed
You can also use a tag to automatically insert an image into your RSS newsletter.
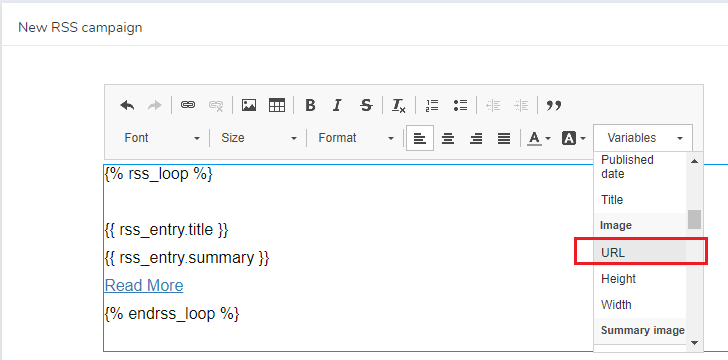
In the editor’s drop-down menu, select the “URL” variable in the «image» block.
This option will insert the {{ rss_entry.image.url }} variable.
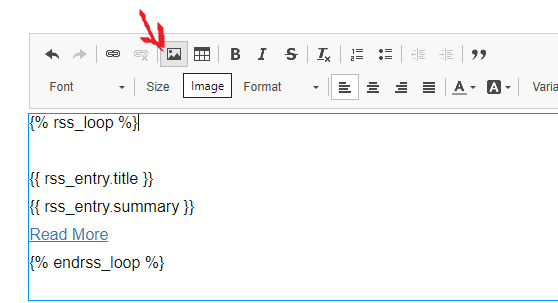
As before, you should copy the tag correctly, or it won’t work.
After that, click on the icon to insert an image:
In the popup that will be displayed, you will have to insert the {{ rss_entry.image.url }} tag as follows:
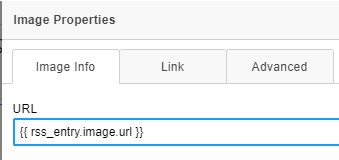
Important
The image will not be displayed during the editing process; you will only be able to see it when the campaign is sent. Also, remember that your blog’s RSS feed must have images available; if there are no images, they can’t be loaded. Also, the fact that you added images to the post doesn’t mean that they will be available in the feed.

After creating your campaign and adding the basic tags, you can test it to make sure everything is working correctly.
In the list of RSS campaigns, we have the following options:
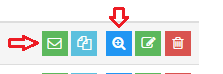
If you click on the magnifying glass icon (the blue icon), you will see a preview of the campaign directly on the Mailrelay dashboard.
If you want to send a test, you can click on the green icon.
This will take you to the following screen:
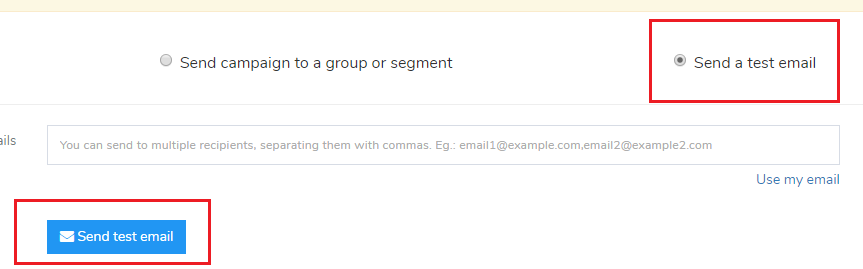
You could, for example, send a test newsletter to Gmail:
As you can see in this example, all tags have been replaced with the values of the entry.
Before sending a newsletter, you should always run tests to check the results. If you do that, you will avoid a lot of headaches.
· Other types of feed, for example, Youtube.
Instead of your WordPress web feed, you can include other feeds, such as the YouTube feed, which generates a URL similar to the following:
- https://www.youtube.com/feeds/videos.xml?channel_id=ID_DE_TU_CANAL
You can see how to find your channel ID here.
Obviously, remember that there are some limitations by the type of feed, for example, it will not be possible to display the summary or the image.
But you can include the title and link to your videos.
That way, you can share your videos with your subscriber list with very little effort.
· In summary
This is a very useful feature for those who have very little time to manage email campaigns.
This option is especially useful for users who post a lot of content, although many marketers prefer to spend more time on email marketing and send personalized content in their email campaigns.
All that’s left is to evaluate the pros and cons of each option.
We hope you can work on this fantastic feature!