How to connect Mailrelay to ChatGPT and Claude: a step-by-step guide and 20 prompts to copy
Everything you need to get ChatGPT or Claude working with your Mailrelay account, with ready-to-copy prompts

Everything you need to get ChatGPT or Claude working with your Mailrelay account, with ready-to-copy prompts
How many times have you opened the dashboard just to check how many clicks your last newsletter got? With the Mailrelay MCP server, you can ask ChatGPT or Claude and get the answer in seconds, based on your real data.
In this guide, we explain how to connect your account step by step, which permissions to grant and what you can ask it to do afterwards. At the end, you’ll find 20 prompts ready to copy.
If you don’t know what this kind of server is yet, start with our post on what an MCP is and how it works. Here, we get straight to the practical side.
To connect Mailrelay to an AI assistant via MCP, you need three things:
A Mailrelay account with the MCP server enabled. It’s currently in beta and is enabled on request, account by account. For now, it’s also included in the free account.
An MCP-compatible assistant. Any assistant that supports remote MCP servers with OAuth sign-in will do: ChatGPT, Claude, Claude Code, VS Code and others.
Your Mailrelay user. You don’t need an API key. You sign in with your user and approve the connection, just like when you sign in to an app with your Google account.
One detail: the assistant can only do what your own user can do in Mailrelay. If your user can’t send campaigns, neither can the AI.
Log in to your Mailrelay account and go to Help → Support tickets. Open a ticket and ask us to enable the MCP server.
While the beta lasts, this step is mandatory. If you try to connect before then, the Mailrelay sign-in page will show you an error.
Once you have access, your MCP server will be at this address:
https://[tu-cuenta]/mcp
Replace [tu-cuenta] with your Mailrelay account domain, the same one you see in your browser’s address bar when you log in to the dashboard. For example, if you log in at yourcompany.ipzmarketing.com, your server is yourcompany.ipzmarketing.com/mcp with https:// in front.
In Claude, adding an MCP server takes less than a minute:
If you use Claude Code, add the server with the command in our documentation. Then type /mcp, choose mailrelay and sign in.
In ChatGPT, the steps to add an MCP server are similar:
Using VS Code? Run MCP: Open User Configuration from the command palette, add an http server with your address and start it from MCP: List Servers. You’ll find the details in our MCP server documentation.
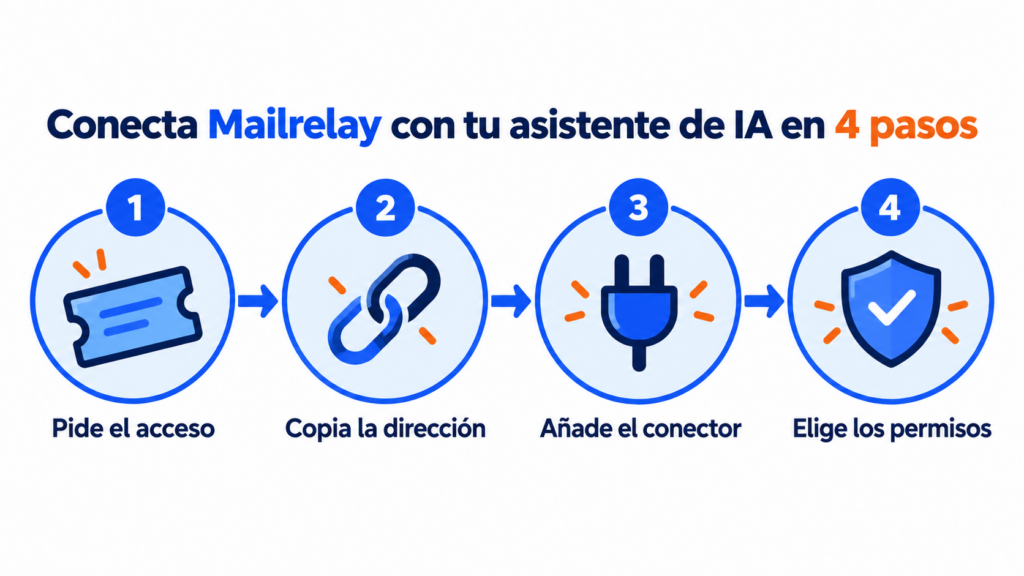
When you sign in, Mailrelay asks how much access you want to give the assistant. It’s the most important decision in the whole MCP connection.
| Option | What the assistant can do | When to choose it |
|---|---|---|
| Read-only | View your data without changing anything | For reports and queries |
| Read and write (default) | View, create and edit, without sending or deleting | For preparing drafts and managing contacts |
| Full access | Everything above, plus sending and deleting | Only if you know exactly what you’re going to ask for |
| Choose specific permissions | Choose each permission by area | To limit access to contacts or campaigns |
The areas are contacts, email campaigns, transactional email, SMS, transactional SMS, WhatsApp, transactional WhatsApp, ecommerce, media library and webhooks. General statistics and your plan details are always included.
Our recommendation: start with read and write. That way, the AI can prepare a complete campaign, but the send button is still yours.
Keep in mind that every action is recorded under the user who approved the connection. And if you want to change the permissions later, remove the connector and add it again.
Ask a question that doesn’t change anything. For example:
Check my connection to Mailrelay and tell me which plan I’m on.
If the assistant replies with your plan details, the MCP connection works. You can now start working with it.
Don’t have a Mailrelay account yet?
Create your free account and request access to the MCP server beta.
These prompts work as they are with the Mailrelay MCP server. They’re grouped by type: reports (1-5), contacts (6-10), campaigns (11-15), SMS and WhatsApp (16-18) and maintenance (19-20). Replace the names in square brackets with the ones in your account: the assistant needs the exact name of the group, tag or campaign.
Next to each one, we show the permission it needs.
Compare the open rate and click rate of my last 5 campaigns and tell me which one performed best and why.
Permission: read email campaigns. It saves you exporting the data and building the comparison by hand. If you want to review this data in the dashboard, see the guide to newsletter sending statistics. If you want to know which figures are good, review what the open rate and CTR are.
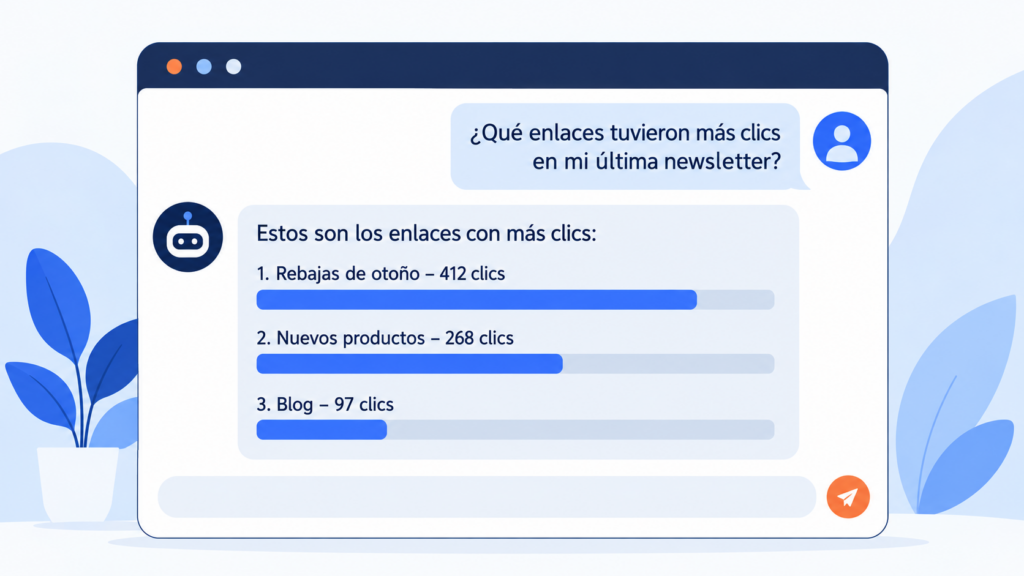
Which links got the most clicks in my last newsletter? Sort them from most to least.
Permission: read email campaigns. It’s the quickest way to find out which content in your newsletter interests your list.
Give me a summary of my account statistics for this month.
Permission: none extra, it’s always included. Ideal for preparing a report for your team in a minute.
Find the subscribers who unsubscribed last week and tell me which campaign we sent just before.
Permission: read contacts and email campaigns. If the unsubscribes cluster after a specific send, that gives you a clue about what people didn’t like.
How many emails do I have left in my Mailrelay plan this month?
Permission: none extra. Useful before scheduling a large send or adding new contacts with double opt-in.
Find [email del suscriptor] and tell me which groups they’re in, which tags they have and when they signed up.
Permission: read contacts. Perfect when a customer writes to support and you want to see their profile without leaving the chat.
Add the “VIP” tag to [email del suscriptor].
Permission: write contacts. Tags help you segment without creating new groups for everything.
Create a “Company size” custom field of the drop-down type with the options 1-10, 11-50 and more than 50.
Permission: write contacts. Custom fields let you personalize and segment with your own data.
Create a group called “October webinar” for the people registered for the next webinar.
Permission: write contacts. Subscriber groups are the basis for sending each audience what interests them.
How did my last contact import go? Tell me how many were added and how many failed.
Permission: read contacts. That way, you spot in time whether a file had problems before you import contacts again.
Prepare a campaign draft to announce our autumn sale, with my usual sender and the group [group name]. Don’t send it.
Permission: write email campaigns. Always review the text and design before sending. If you’re looking for inspiration, take a look at these email marketing examples.
Look at the subject lines of my last 10 campaigns and suggest 5 subject lines for the next one, in the same style as the ones that performed best.
Permission: read email campaigns. It combines your data with the AI’s writing skills. You’ll find more ideas in our guide to email subject lines.
Send a test of that draft to my email address.
Permission: send email campaigns. It’s the step you should never skip before a real send.
Set up an A/B test with two different subject lines for the draft [campaign name].
Permission: write email campaigns. If you’re not sure how it works, review what an A/B test is and how to run one in Mailrelay.
Pause the campaign that’s being sent right now.
Permission: write email campaigns. Very useful if you spot a mistake once the send is already under way.
Prepare your next campaign with AI
Open your free account and connect your assistant in a few minutes.
Tell me which WhatsApp templates are still pending approval.
Permission: read WhatsApp. Templates need Meta’s approval before you can use them, as we explain in the WhatsApp Business API guide.
How many messages from my last WhatsApp campaign were delivered and how many were read?
Permission: read WhatsApp. It gives you the WhatsApp marketing figures that matter most in no time.
Show me the delivery status of yesterday’s SMS campaign. I’m on Madrid time.
Permission: read SMS. State your time zone: Mailrelay stores times in UTC. More about this channel in SMS marketing.
List my senders and tell me which ones are pending confirmation.
Permission: read email campaigns. An unconfirmed sender is a send you won’t be able to make.
Which event notifications do I have set up and which addresses do they send the alerts to?
Permission: read webhooks. That way, you can check that your CRM is still receiving sign-ups and unsubscribes, as we explain in the webhooks in Mailrelay tutorial.
If you’re unsure which permissions to choose when connecting, this table sums up what you’ve just seen:
| I want to… | Permission needed |
|---|---|
| View statistics, plan and usage | Always included |
| Look up contacts, campaigns, SMS or WhatsApp | Read for the area |
| Create groups, tags, fields or drafts | Write for the area |
| Pause or cancel a campaign in progress | Write campaigns |
| Send tests, campaigns or messages | Send for the area |
| Delete contacts, campaigns or files | Delete for the area |
Draft first, send later. Always ask for a draft and a test to your email address before anything reaches your list.
Be specific about dates. Mailrelay stores times in UTC. If you say “yesterday” or “this morning”, add your time zone.
Use the exact names. Write the name of the group, tag or campaign exactly as it appears in your account.
Only grant the permissions you use. If you only want reports, connect with read-only access. You can always extend them later.
Check what the AI does. Artificial intelligence is fast, but it can make mistakes. Check the data before making important decisions based on it.
Most MCP problems have a quick fix.
The sign-in page shows an error when connecting. The MCP server isn’t enabled on your account yet. Open a ticket from Help → Support tickets and connect again once we confirm your access.
The assistant says it doesn’t have permission or that it’s missing a tool. You didn’t grant that permission when connecting. Remove the connector, add it again and tick the permission you need.
The assistant asks you to sign in again. Connect again from your assistant’s connector settings.
Still not working? Write to us with the assistant you use, what you asked it and the error it showed you. That way, you also help us improve the beta.
Mailrelay is an email marketing platform with email campaigns, SMS, WhatsApp, automations and transactional email in a single dashboard. The MCP server brings all of that to your AI assistant, and you can also integrate it with other systems through the API and webhooks.
The free account includes 80,000 emails a month and up to 20,000 contacts, with chat, ticket and phone support. And, for now, the MCP server too: you can connect your AI assistant without paying anything. And if you already use AI to write, our guide on AI in email marketing has more ways to get the most out of it.
You don’t need to change the way you work all at once. Request access, connect your assistant with read and write, and try prompt number 2. As soon as you see your most clicked links in a chat, you’ll understand why it’s worth it.
Start with your first prompt
Create your free account and request access from Help → Support tickets.
These are the questions we get asked most about the Mailrelay MCP server.
It’s the MCP connection that lets AI assistants such as ChatGPT or Claude query and manage your Mailrelay account with the permissions you choose. It’s in beta, it’s enabled on request via a ticket and, for now, it’s also available on the free account.
No. You sign in with your Mailrelay user and approve the connection. The API key is only needed for direct API calls.
Only if you give it the send permission. Without it, the assistant can prepare drafts, but not send them.
Not yet. Permissions apply to a whole area, such as contacts or email campaigns.
Remove the connector in your assistant and add it again. Mailrelay will ask you for the permissions on every new connection.